Live photos are an iPhone camera function that lets the photos you take live. Instead of freezing motion to time, when you take a photograph, the iPhone camera captures 1.5 seconds before and after the picture when the live feature is enabled. Live photos are currently present on every phone running iOS 6 and earlier.
In comparison to traditional photographs, The live image is an innovation. But when you share live photos, the motion is typically not visible. Additionally, looking at a live picture using any other device is impossible. This is why many choose to turn live images into videos.
The iPhone’s Photo App helps you easily convert live images into videos. In this article, we’ll show how to save live photographs to video step-by-step, using two methods. Begin by following us.
What exactly is a live image?
The Live Photos feature is an exciting and new feature that is enjoyable to play with. The live images are recorded for at least 3 seconds, including the first and a half seconds taken before and after the shutter button click.
Viewing the live picture is simply a matter of pressing and holding. The first thing you would think of is undoubtedly a video; however, it’s the High-Efficiency Imaging file ( HEIF ) format. It will select one photo as the primary image. It only shows the picture when you share the file, but what happens if you want to share the entire sequence of images or in GIF? GIF? Along with other issues, Users cannot turn a live photo into a video.
How to Save a Live Photo as a Video on iPhone
Its Live Photos combine a still photograph with a short video, before and after it; however, the feature could perform better in other apps of Apple. Follow these steps to save your Live Photo as a video. This process works for both iPhone as well as iPad devices.
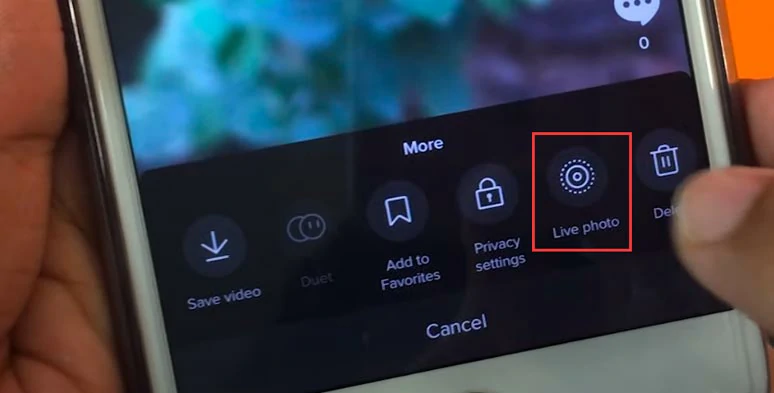
Within the Photos app, select the Live Photo you want to save to a video, and click to share it.
Choose”Save as Video” from the menu of choices. When you save the Live Photo will save as instantly as a video.
The new video may only sometimes show on your Photos view. That is what you see in the view when the Photos application is open. You may need to go through Albums Then Recents to locate the file.
How to Save a Live Photo as Video on iPhone
Saving a Live Photo in a video form is fairly simple. It’s okay to download the right application for this.
Comply with these instructions:
Since you already have a Live Photo ready in your gallery, select the Live Photo or tap the photo to see it. Be aware that when you press long on an image in a Live Photo, it will play the image in motion.
When you have selected or viewed the image, after which the share icon will appear, all you have to do is hit the share icon and then browse through the available sharing options.
Choose the option “Save as Video”, and you’re accomplished!
This way, you can have the video of the Live Photo while still retaining the original image.
If you now have a video version, that’s this Live Photo you’ve selected. You can take whatever action you like with the video. You can post it on social media or alter it the same way you would with a normal video. The choice is yours!
How can you turn the video into a Live Photo using IntoLive?
If you wish to alter the settings and convert a video to a Live Photo, you must look beyond Apple’s pre-loaded apps and locate a third-party application similar to IntoLive.
The app IntoLive is free, letting you turn your videos and GIFs to Live Photos to make them animated wallpaper using your iPhone. Learn how to utilize the app to convert the video you’ve recorded into a live photo:
Launch the IntoLive application.
Scroll down and then select the type of video you want to watch.
Make use of the tools for editing the video using filters, altering the colour of the background, altering speeds, zooming out, or muting the sound.
After editing, click Make in the upper-right area of your screen.
Choose the number of times you wish Live Photo to do.
Press Save Live Photo.
The new Live Photo will be stored in the Camera Roll. Although the app is free to download and access, it also has paid-for in-app purchases for editing tools, filters and loops with repeated repeats.
How to Edit Live Photos?
iPhone allows you to edit Live Photos on the iPhone to increase the excitement. Adding filters, cutting your frames, or changing the contrast and colour is possible. We’ll show the exact method of editing the Live Photos in the following sections.
Start the Photos app, and select a Live Photo you’d like to modify. Select”Edit. “Edit” option on top of the photo.
Adding a range of features to the Live Photo is now possible. iPhone allows you to select any image you want to include in the middle of the Live Photos.
Additionally, you can use the slider to trim the Live images’ frame size. You can turn off the sound using the “Volume” button on the screen.
Additionally, you can alter your Live images to create tactic pictures using”Live Pictures” and then the “Live Photos” button. In addition, you can alter the colour, exposure and contrast using the “Enhance” “Enhance” option.
Furthermore, you can edit your Live Photos to crop them and apply filters to them. Press “Done” to save your modifications.
In addition to the above options, you may also apply the option of customizing your settings for images. Every image you alter is saved to the Photos app for viewing and sharing.
Tips for Making a Great Live Photo Video
If you’ve ever snapped the Live Photo with your iPhone, You’ve probably noticed that they’re awesome. Could you transform those Live Photos into videos? Here’s how!
- Start the Live Photo inside the app Photos.
- Click on the share button.
- Touch on the Live Photo icon.
- Press the Share button a second time.
- Select Save Video.
It’s that easy! You now have a charming short video clip you can show everyone you know.
Here are some suggestions to make amazing Live Photo videos:
- Use a tripod. It will prevent the Live Photo from being too shaky.
- You can set the timing. This will allow you to move into the position before the Live Photo starts recording.
- Choose the best location. You should ensure you’re in a well-lit area to ensure that your Live Photo looks amazing.
- Make it your own. Take it easy! Live Photos are about taking a picture; feel free to think outside the box.
- Make sure to share your Live Photo. After you’re done, post the Live Photo with your friends to let them see it!