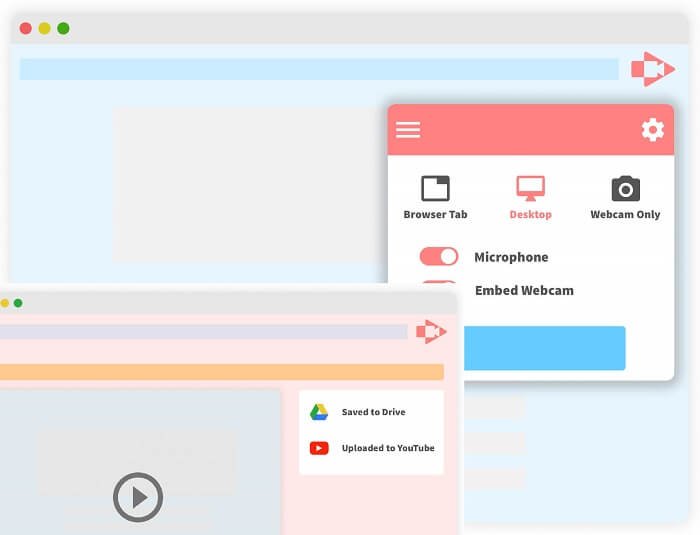
Screencastify, a Google Chrome extension that allows you to capture screen images on your computer, is amazing. It’s possible to use it in many ways in the classroom. You can record lessons or have your students become creators.
See also: 10 Best Free SEO Chrome Extensions
Screencastify has many uses in my classroom. Screencastify is so easy to use and get started. Just open a new tab, click the extension and I’m ready to go.
Screencastify comes with all these keyboard shortcuts. Screencastify can help you save precious hours. The Screencastify offers the option to customize keyboard shortcuts, allowing you to maximize your productivity.
Screencastify – What’s it all about?
Screencastify might seem confusing at first, Screencastify is a Google Chrome extension which allows you to capture your screen.
This sounds very simple, right?
It is easy to use and simple. It’s very easy to use and intuitive. I was able to understand the basics in no time. I did have to search for the correct way to trim videos.
How to Get Screencastify
The #1 absolute easiest way to get Screencastify is to visit their website: www.screencastify.com. You can click on Add To Chrome from there (located in the top-right corner of the page).
This will take to Chrome Web Store where the extension can be added. Click on Add Extension, then click again. It’s easy!
Once the icon has been added to your browser, click the Icon and then follow the initial setup steps.
Screencastify: Keyboard shortcuts
So now that Screencastify has been installed, where can you find keyboard shortcuts for Screencastify? What’s more, why bother?
The keyboard shortcuts you can use are simply amazing! My productivity increases and time is spent on a task goes down when I use keyboard shortcuts. Although it might save you just a few seconds at first, you will be able to navigate your mouse and click more efficiently over time. Screencastify keyboard shortcuts can save you a lot of time. Screencastify provides a list of keyboard shortcuts.
There are shortcuts to both the recording and drawing tools. Unfortunately, the only way to customize recording shortcuts is by customizing them. You will need to know the shortcuts to drawing tools if you want them to work.
Print out the list of keyboard shortcuts, and then tape it to your recording area. You can look it up if you lose the list.
How do I customise my keyboard shortcuts?
I have a very good memory, and I can memorize quite a few random bits of information. Memorizing keyboard shortcuts is easy for me.
But I understand that this can be difficult for some. It can be especially difficult when you have multiple buttons to press at once!
You can change the keyboard shortcuts to make it more easy to remember. It should be customized and make sense to you.
Screencastify is limited in its ability to customize the recording shortcuts. The shortcuts to the drawing tools are not customizable. The upside is that you will have keyboard shortcuts unique to you and easier to remember once you have changed the recording shortcuts.
Screencastify’s keyboard shortcuts can be changed in a few easy steps. Follow these steps to access the Screencastify keyboard shortcuts:
Step 1
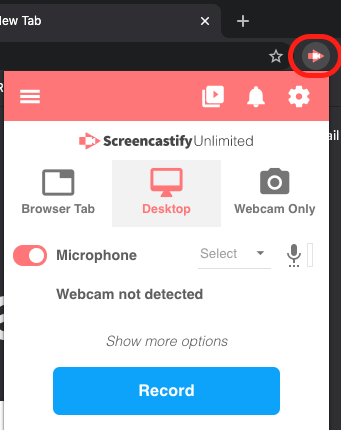
Open your Screencastify extension on Chrome. To do this, click the icon located in your toolbar right above the omnibox.
Step 2

Click on the three lines, or I like to refer to them as the three pancakes, in the top-left corner of the application windows. This will give you many other options.
Step 3

Click on Options. It should be the third item at the top of your list. You can also find it by using the icon of a cog wheel.
Step 4
Scroll down until Keyboard Shortcuts appears (third from top). There are two options available: configure recording shortcuts, and view drawing tool shortcuts.
Click on the configure shortcuts link to access the menu to modify your shortcuts.
Step 5
This will bring up the customizer to all of your Chrome extensions. This is where you can modify the keyboard shortcuts for Screencastify as well as those for any extension that you have.
- You can find the Screencastify extension by clicking here.
- Shortcuts Recording
- Only four keyboard shortcuts can be customized in the settings.
- Activate your extension
This shortcut opens Screencastify, so you don’t have to click on it in the toolbar next to the Omni box. The default setting is Alt + Shift + + S on a PC, or Option + Shift + + S for a Mac.
Move the recording focus to the current tab
I’ll admit it, I don’t know what this shortcut does. It didn’t do anything regarding recording settings when I tried it. However, the default setting for it is Alt + Shift+F on a Mac or Option+ Shift+F on a PC. Please leave a comment below to let us know what you think this shortcut does!
Pause/resume recording
You need to take a break during recording? Do you need to quickly check your notes or forget what you want to say? This shortcut lets you quickly pause and restart your recording. It default setting is Alt+ Shift+P on a Mac, or Option+ Shift+P on a PC.
Recording: Start/Stop
This shortcut is the best! This shortcut lets you start and stop your recording from anywhere. The default setting is Alt +Shift +R (on a Mac) or Option +Shift +R (on a PC).
What are your shortcuts?
Choose something that makes sense for you first and foremost. What is the easiest thing to remember? It would be a good idea to change the keys to make it easier to remember than the 3 you have.
The second is to think about what shortcuts any other extensions that you have installed for Chrome use.
It’s a smart idea to look at the keyboard shortcuts for other extensions in Chrome extension customizer. This was done in step 5. Screencastify could be interrupted by other extensions if you’re not careful.
You should also pay attention to the shortcuts available for the drawing tools. You can’t customize these shortcuts so make sure to choose different ones for your recording shortcuts.
I would recommend sticking to letters that start with the task. You can use R to begin and stop recording, P to pause recording, and O to open the extension.
Ready To Learn More?
Screencastify is a Chrome extension that does so much. Teachers will find it extremely useful, especially if you’re doing blended learning, flipped classroom or fully online education.
Screencastify has a lot of great resources as well as professional development courses. You can also explore these links:
https://www.screencastify.com/education – Teacher Resources
https://www.screencastify.com/courses – Professional Development Courses
Remote Learning With Screencastify also received an entire podcast episode. You should definitely check it out.
The Screencastify Keyboard Shortcuts
Screencastify users can personalize their keyboard shortcuts. You can click in this box and select the key combination that will launch Screencastify. You can also use the default keyboard shortcuts. This article will discuss the Screencastify Keyboard Shortcuts that you must know. Let’s start! Screencastify, an extension for Chrome, is one of the most popular screen recording apps. The fact is. The fact that it’s a browser extension doesn’t necessarily mean that it can not record your desktop.
Screencastify can be mastered if you make use of all the shortcuts. Screencastify also has many great shortcuts available for your convenience. Here are some Screencastify keyboard shortcuts that you should know. This will enable you to get the most from this wonderful extension.
Open Screencastify | Screencastify Keyboard Shortcuts
With a simple Alt + Shift+ S command, you can open the extension from any browser at any time. You can adjust your video recording settings instantly by pressing Option + Shift + s on macOS.
Recording – Start or stop recording
Manually stopping the recording can make you look less professional, and your videos will be less smooth. The tail end can be cut out, though, so there is a way around. It is unnecessary to cut the tail end of the video during editing. There is an easier way. It will stop the recording. For screen recording to stop/start, press Alt + Shift+R (Windows) or Option+ Shift+R (Mac).
Screencastify Keyboard Shortcuts: Resume or Pause Recording
You must also use the pause/repeat command. This shortcut is not available. You will have to manually pause your video, and then adjust the pauses in postproduction. Instead, instead use Alt + Shift+P (Option Shift+P). You can pause and resume recording at your leisure.
You can toggle the annotation bar by pressing Alt + T or Options + T.
If you’ve ever seen tutorial videos online you will have seen others highlighting their pointer. It will make it easier for your viewers to follow. It’s a simple command that switches the focus of the mouse’s spotlight to on or off. This can be activated by pressing Alt + F, Option + F, or both.
Sometimes you want viewers to be able to tell when you clicked and how often, without you having to listen. You can do this by using the Alt + K shortcut (Option + K). You can use it to highlight each mouse button click with a circle.
Pen and Eraser
For more advanced showcase options, use the pen or eraser tools to enhance your videos. To activate the pen tool press Alt +P (Option+P) or Alt+E (Option+E) to use the eraser.
To wipe your screen clean of all edits, press Alt+Z or Option+Z.
Shortcuts
To return the mouse cursor to its original position, press Alt+ M or Option+ M. If the mouse pointer is not moving, press Alt+ M or Option+ M. To toggle the embedded webcam, press Alt+ H or Option+H. To hide or display the recording timer, press Option + W. Press Alt + C, Option + H.
Screencastify Keyboard Shortcuts
You will need to practice using the keyboard shortcuts. It is normal to get frustrated when you can’t remember which command to use in order to pause or stop the video. It is best to have them available somewhere you can easily reference while recording. This video shows you how to use keyboard shortcuts during a presentation.
Screencastify has a unique advantage: You don’t need to use the shortcuts. You can personalize each one according to your preferences. To do so, first open the extension. Open the Main Menu, then click Options. Select Configure Recording Shortcuts from the Keyboard Shortcuts Section. Select a shortcut from this section and then configure it according to your choice. You can also adjust the shortcut preferences for different browsers.
Conclusions
Use the following shortcuts to get the most out your videos. While they might not appear like much, each has its advantages. No worries if one is not your favorite.
Okay, that was enough Folks! I hope you enjoy this Screencastify Keyboard Shortcuts Article and find it useful. Please leave feedback. You can also contact us if you have any other questions.
We’re curious. Have you made Screencastify shortcuts more personal? Did you customize your Screencastify shortcuts? If so, which one? Leave a comment below